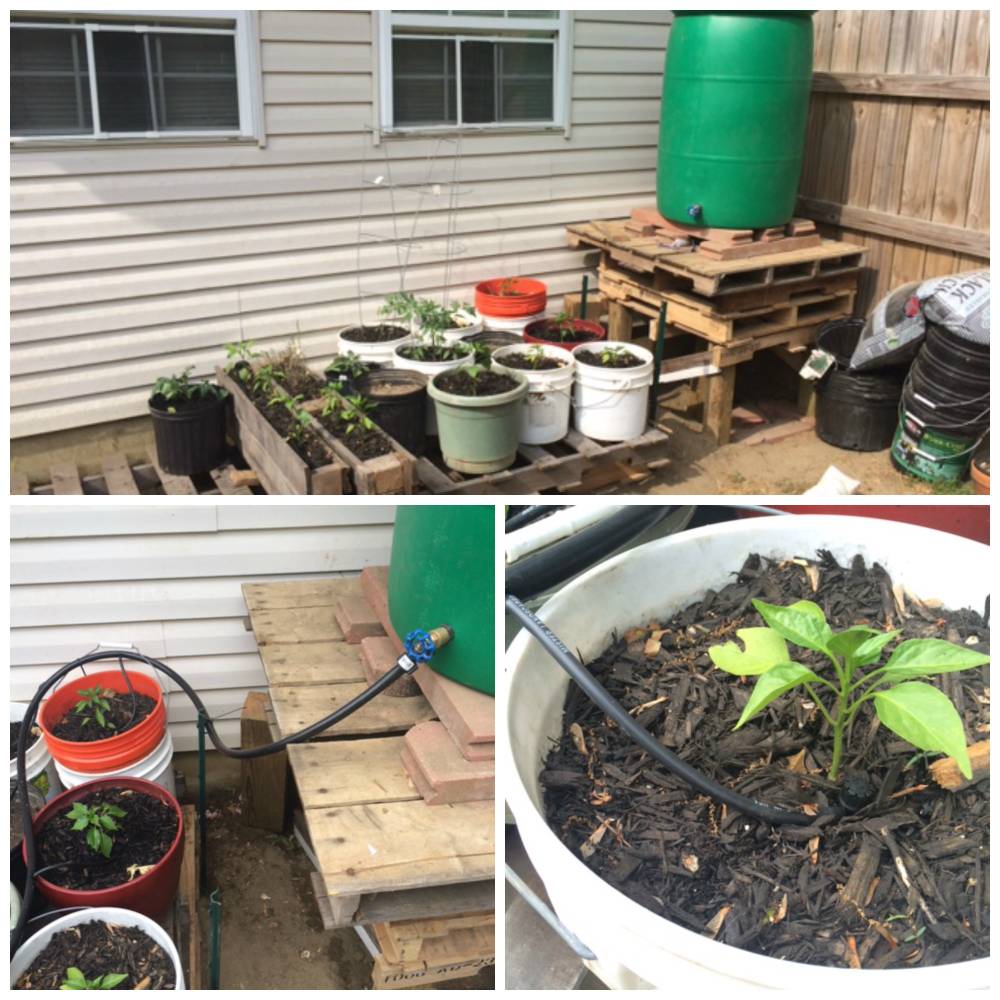
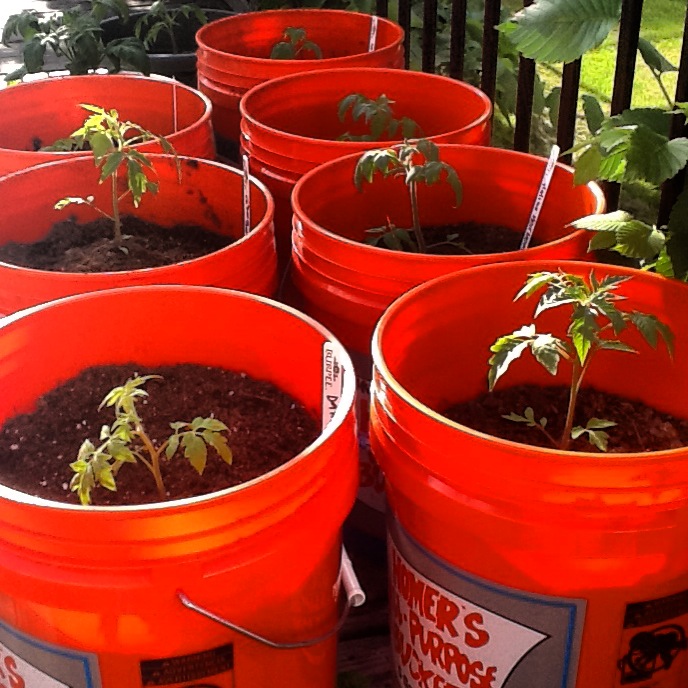
5 gallon buckets are great if you’re limited on space!
You can easily grow your entire garden in buckets and I highly recommend it; with a little planning you can get most of the supplies you need cheaply or even for free. Bucket planting not only takes up less space but you can move buckets that are getting too much or too little sun. Larger plants like peppers and tomatoes will need their own 5 gallon bucket. Smaller plants like leafy greens will have enough space to thrive planted 2 to a bucket.
First thing you will need to do is make a list of necessary equipment for your bucket garden.
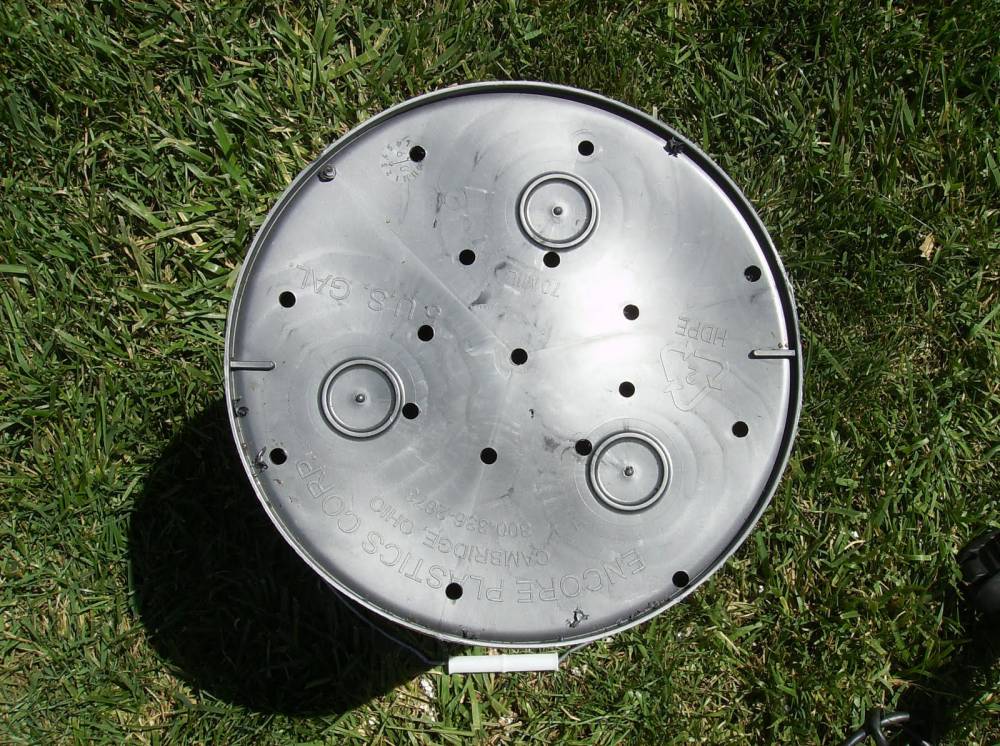
Obviously, 5 gallon buckets should be first on your list. The buckets should be new; but if you’re like me and like to Reduce, Reuse and Recycle, and you choose to acquire used buckets, make sure they contained only food safe material. I have had great success obtaining free buckets from local restaurants, many restaurants will be happy to turn them over to you as long as they don’t reuse them. Drill 1/2″ holes in the bottom of the buckets, equal distance apart, to allow for drainage.
Next up is the soil. Here is where you would want to spend some extra money, since quality soil is the most important part of gardening. If you have soil that lacks nutrients and drainage, your crop will be noticeably effected. In your clean, weed free soil, mix peat moss and vermiculite (feel free to add some organic compost, which I will talk about later in the post), which will add water retention properties along with soil aeration. I have had great success by adding 1 inch of gravel to the bottom of the bucket, followed by 1 inch of sand (both to allow for better drainage), topped with my soil/peat moss/vermiculite mixture.
What could be better than growing your own vegetables in your yard?
Sustainably watering them by catching the rain water from your roof and using it to water those vegetables. Check out this site to see if your state is “cool with it” but it’s always a good idea to check the local ordinances yourself.
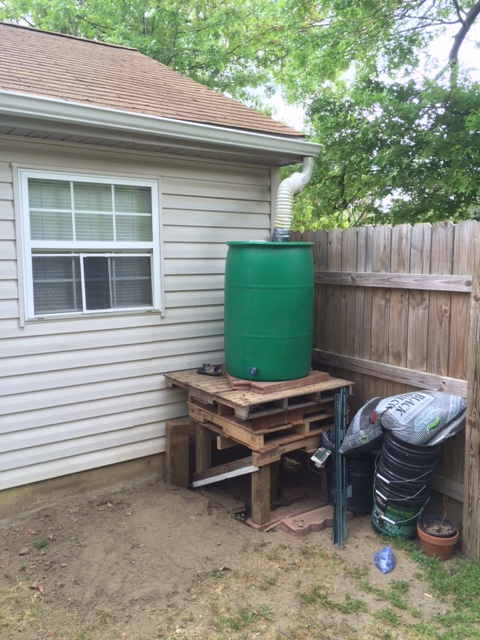
With a bit of work, you can get most of the requirements for a rainwater catch for little to no money (Reduce, Reuse and Recycle). I would recommend a 55 gallon plastic drum; I was lucky enough to get my rain barrels from Heilig Orchards for free. A good place to get these barrels is from a local car wash, just make sure it wasn’t holding any nasty chemicals and when in doubt, don’t use it.
Your very own rainwater catch is as easy as diverting the downspout from your gutter to go directly into the top of the barrel (flexible downspout extenders are cheap and easy to use), while making sure no mosquitoes can get into the barrel where they will lay eggs and make your summer an itchy mess. Drill a hole in the side, toward the bottom, and add a spigot. Don’t forget to add an overflow hole toward the top, which you can connect to another 55 gallon drum.
Want to add drip irrigation, just like our growers?
Having your rain catch located higher than your plants (thank you gravity) will make this system work efficiently. Many of the big name hardware stores sell everything you need to start your own drip irrigation system, some even sell starter kits that hook directly up to a spigot.
Gravity fed drip irrigation, using rainwater catch.
To become even more sustainable try starting a compost pile!
It will not only lower the amount of trash that goes to landfills but it will also provide your vegetables and plants with an excellent source of organic matter when added to your soil. Composting seems like it would be straight forward, yet there are some things to consider to get the best compost. I refer to How To Compost, for all my composting needs.
If you liked what you saw here, don’t forget to follow Farmhouse Fruit on Instagram and Pinterest.
Be part of the solution and not the problem.
Chad R. Puschel